

When I reflect on my journey as a seasoned UX designer, I can’t help but acknowledge the pivotal role that prototyping has played throughout my career. Prototyping isn’t just a tool or technique; it’s a mindset that breathes life into your design ideas and sets the stage for creating exceptional user experiences. In this article, I want to take you on a journey through the world of prototyping in UX design, providing you with a beginner’s overview and sharing insights that have been honed through years of hands-on experience.
Prototyping: The UX Designer’s Secret Weapon
At its core, prototyping is the process of creating a preliminary version of a digital product or interface to visualize and test design concepts. It acts as a tangible bridge that connects your imagination to reality. Think of a prototype as a sketch, a rough draft, or a mockup that encapsulates the essence of your design idea. Prototypes can take various forms, from simple paper sketches to highly interactive digital models, depending on the project’s complexity and goals.
The Essence of Prototyping
Prototyping serves as a foundational element in the UX design process, offering numerous benefits that can significantly impact the outcome of a project. Here are some key advantages:
- Visualization: Prototypes bring your design concepts to life, helping you and your team visualize how the final product will look and function.
- User Feedback: Prototypes enable early user testing and feedback, allowing you to identify usability issues, pain points, and areas for improvement before committing to full-scale development.
- Communication: They facilitate effective communication and collaboration among design teams, stakeholders, and developers by providing a shared reference point that everyone can understand.
- Validation: Prototyping empowers you to validate design assumptions and make informed decisions based on user interactions and feedback.
- Iterative Design: With prototypes, you can embrace an iterative design approach, refining and enhancing your design through multiple cycles of improvement.
- Risk Mitigation: Addressing design flaws early in the process reduces the risk of costly mistakes and revisions during the development phase.
The Many Faces of Prototypes
Prototypes come in various shapes and forms, each serving a specific purpose within the design process. Here are some common types of prototypes that you may encounter:
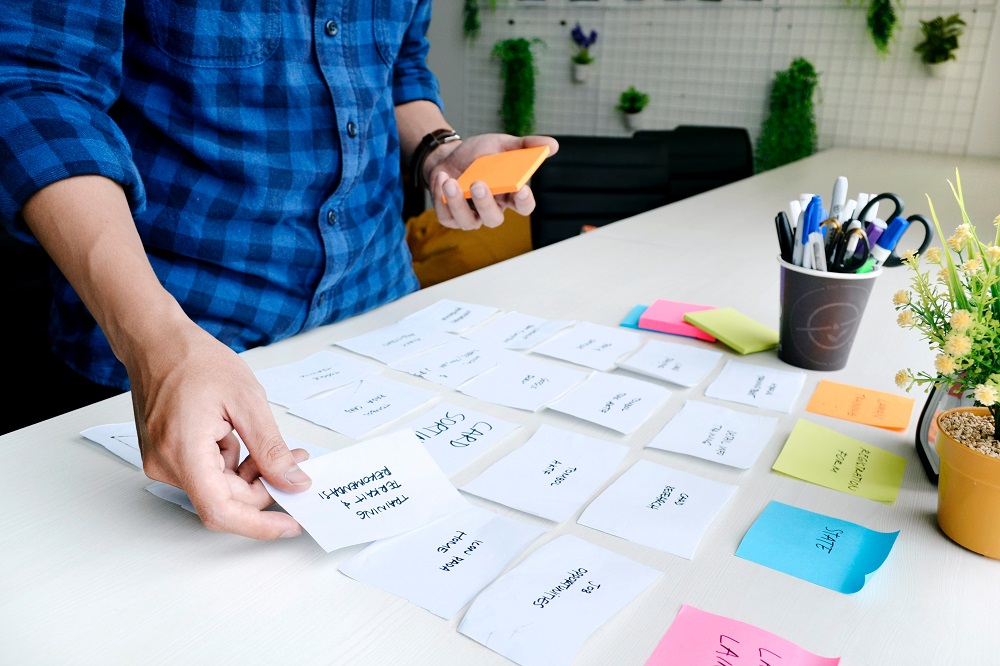
1. Paper Prototypes
Paper prototypes are the embodiment of simplicity. They are hand-drawn or printed representations of a design idea on paper. These humble yet effective prototypes are perfect for early-stage ideation and testing. Paper prototypes shine when it comes to sketching out user interfaces and conducting usability tests without the need for extensive resources.
2. Wireframes
Wireframes are low-fidelity digital or hand-drawn representations of a design’s layout and structure. They focus on the placement of elements, content hierarchy, and navigation flow. Wireframes provide a clear and concise blueprint for the skeletal framework of your design and are typically static.
3. Clickable Prototypes
Clickable prototypes, often referred to as interactive prototypes, elevate the level of fidelity. They allow users to interact with the design by clicking through screens or pages. Clickable prototypes offer a more realistic simulation of the final product’s user experience and prove invaluable for usability testing and gathering user feedback.
4. High-Fidelity Prototypes
High-fidelity prototypes closely resemble the final product in terms of visual design and interactivity. They incorporate detailed graphics, fonts, and even animations. High-fidelity prototypes excel when it comes to presentations, stakeholder reviews, and serving as a reference for developers during the implementation phase.
5. Functional Prototypes
Functional prototypes take the prototype game to a whole new level by simulating actual user interactions and behaviors. They may include functional buttons, forms, and data inputs. Functional prototypes are instrumental in validating complex interactions and ensuring the functionality of the design.
The Prototyping Process: Step by Step
Now that you have a grasp of the significance of prototyping and the myriad types at your disposal, let’s embark on a journey through the prototyping process itself. Here’s a step-by-step guide to get you started:
1. Define Your Goals and Objectives
Before you dive into prototyping, it’s crucial to have a clear understanding of your goals and objectives. What do you aim to achieve with the prototype? Are you testing a specific interaction, validating a design concept, or gathering user feedback? Having a well-defined purpose will serve as your guiding star throughout the prototyping process.
2. Sketch Your Ideas
Commence your prototyping journey by sketching your design ideas on paper or using digital tools. At this stage, your sketches need not be elaborate; they should capture the essence of the layout, key elements, and user flow. Sketching empowers you to explore multiple design concepts quickly and efficiently.
3. Create Low-Fidelity Prototypes
Building upon your sketches, it’s time to construct low-fidelity prototypes, such as wireframes or paper prototypes. These initial prototypes act as the foundation upon which you’ll refine the layout, structure, and navigation of your design. Keep these prototypes simple, focusing on the core functionality of your design.
4. Test and Gather Feedback
Once you’ve crafted a low-fidelity prototype, it’s time to put it to the test. Conduct usability testing with real users or stakeholders, keenly observing how they interact with the prototype. Listen attentively to their feedback and watch out for pain points or areas that require improvement. Usability testing at this stage is invaluable for unearthing critical issues early in the design process.
5. Iterate and Refine
Based on the feedback and insights gathered during testing, it’s time to iterate on your prototype. Make necessary adjustments to address usability issues, improve user flows, and refine the design. Continue to test and refine your prototype through multiple iterations, always seeking to enhance the user experience.
6. Create Higher-Fidelity Versions
As your design matures, gradually transition to higher-fidelity prototypes. Add more detail, visual design elements, and interactivity to your prototypes. Depending on your project’s requirements, you may create clickable prototypes, high-fidelity prototypes, or even functional prototypes.
7. Test Again
With higher-fidelity prototypes, conduct additional rounds of usability testing to validate the design’s visual appeal, interactions, and overall user experience. Pay close attention to user feedback and make refinements as needed to ensure that your design aligns with user expectations.
8. Share with Stakeholders
Present your prototypes to stakeholders, clients, or team members to gather their input and approval. Prototypes serve as a valuable communication tool to ensure that everyone involved in the project is aligned with the design direction. Gathering feedback from stakeholders can provide valuable insights and perspectives.
9. Handoff to Development
Once your prototype is finalized and approved, it becomes a valuable reference for developers. They can use it to understand the design specifications, interactions, and visual styles, making the development process smoother and more accurate. A well-documented prototype can serve as a bridge between design and development teams, ensuring a seamless transition from concept to implementation.
The Tools of the Trade
To create digital prototypes, you’ll need to leverage prototyping tools. These tools come in various shapes and sizes, catering to different design needs and preferences. Here are some popular options:
- Figma: Figma is a versatile cloud-based design tool that offers collaboration features and supports the creation of interactive prototypes.
- Sketch: Sketch is a macOS-based design tool known for its user interface design capabilities. It can be paired with plugins like Sketch Prototyping to create interactive prototypes.
- Adobe XD: Adobe XD is an all-in-one design and prototyping tool that allows designers to create and share interactive prototypes.
- InVision: InVision is a dedicated prototyping tool that enables designers to create clickable prototypes and collaborate with stakeholders.
- Axure RP: Axure RP is a robust prototyping tool that provides advanced interactions and dynamic content capabilities for complex projects.
- Balsamiq: Balsamiq is a wireframing tool that is ideal for creating low-fidelity prototypes and sketching out initial design concepts.
The choice of prototyping tool depends on your project requirements, team preferences, and the level of interactivity you need for your prototypes.
Overcoming Common Prototyping Challenges
As a beginner, you may encounter some challenges when diving into prototyping. Here are a few common hurdles and how to navigate them:
1. Overthinking Fidelity
It’s easy to get caught up in making your prototype look perfect, especially when transitioning to high-fidelity designs. However, remember that the primary goal of prototyping is to test and validate your design concepts. Don’t be afraid to start with low-fidelity prototypes and gradually increase fidelity as needed.
2. Balancing Speed and Detail
Finding the right balance between creating a detailed prototype and meeting project deadlines can be a challenge. Prioritize the aspects of your design that require testing and focus on those. Not every element needs to be fully polished in the early stages of prototyping.
3. Resistance to Feedback
Receiving feedback on your designs, especially when it reveals flaws or areas that need improvement, can be challenging. Embrace feedback as a valuable opportunity for growth and refinement. Constructive criticism is an essential part of the design process.
4. Staying Agile
In an ever-evolving design landscape, it’s essential to stay agile and open to new tools and techniques. Be willing to experiment with different prototyping approaches and adapt to the needs of your projects.
Conclusion: Prototyping as a Creative Journey
As you embark on your journey into the realm of UX design, consider prototyping not just as a step in the process but as a creative journey that unfolds with each iteration. Embrace the freedom to explore, the courage to make mistakes, and the determination to improve. Prototyping is your canvas, and with each prototype you create, you’ll paint a more refined and user-centric picture of the final product. So, start sketching, testing, and refining your ideas, and let the magic of prototyping guide you towards creating remarkable user experiences.
Facebook
Twitter
LinkedIn
Pinterest
ABOUT AUTHOR

Alison Housten
Lorem ipsum dolor sit amet, consectetur adipiscing elit. Ut elit tellus, luctus nec ullam.

RECENT POSTS

The Evolving Role of UX Designers in Today’s Digital Landscape
December 13, 2023
No Comments
ADVERTISEMENT